How Are Earbuds Made? A Factory-Floor Look at the Full Manufacturing Process
If you’ve ever pulled a pair of earbuds out of a charging case and wondered how something that small actually works — let alone how a factory turns out tens of thousands of identical units a month — you’re asking a better question than most buyers do.
How earbuds are made isn’t just a curiosity. If you’re sourcing earbuds for an Amazon storefront, a private label launch, or a wholesale order, understanding the process is the difference between picking a factory that can hold a spec and picking one that can’t.
I’ve spent years on the production floor side of this business, watching plastic pellets turn into shells and reels of components turn into finished PCBs. This article walks through that process stage by stage — not the marketing version, the actual sequence — and points out where quality gets built in or lost along the way.
The Short Answer: 11 Stages from Design to Shipping
Before the deep dive, here’s the process at a glance. Every legitimate earbuds factory follows some version of this sequence:
Product design and engineering
Component sourcing (chipset, driver, battery, mic, PCB)
Driver and acoustic engineering
Injection molding of the shells
PCB assembly (SMT)
Acoustic assembly and sealing
Final assembly
Firmware programming and pairing
Quality control and testing
Certification, branding, and packaging
Warehousing and shipping
None of these steps is optional, and skipping or rushing any one of them is usually where the “why did my return rate spike” problems start. Let’s go through each one.
Step 1: Product Design and Engineering
Every pair of earbuds starts as a design brief, not a mold. Before any tooling gets cut, engineers and industrial designers have to lock down:
Earbud shape and ear-fit ergonomics (in-ear, open-ear, or hook-style)
Internal layout — where the battery, driver, mic, and antenna physically sit inside a shell that’s often smaller than a thumb
Battery capacity for both the earbud and the charging case
Acoustic chamber structure, which determines bass response before a single driver is installed
Feature set: ANC, ENC, touch controls, Bluetooth version, IP rating
3D modeling comes first, followed by CNC-machined or 3D-printed prototypes for fit and comfort testing. This is also where a buyer’s requirements get translated into something a factory can actually tool for — if you’re working with an existing wholesale platform, this stage is largely pre-built; if you’re doing a full custom project, expect several rounds of prototype revisions before the design freezes.
Step 2: Component Sourcing
An earbud is a small device with a long bill of materials. Factories either manufacture components in-house or source them from qualified suppliers, and this is where component quality starts compounding into final product reliability.
The core components include:
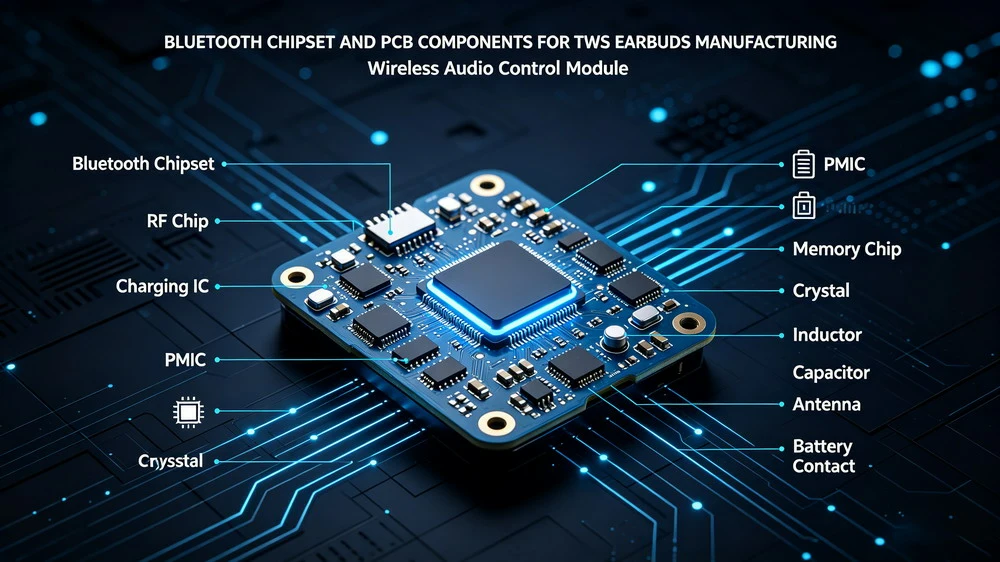
Bluetooth chipset — Qualcomm QCC, Airoha, BES (Bestechnic), or Jieli, depending on the target price point and feature requirements
Speaker driver — the part that actually produces sound
Lithium battery — for both the earbud and the charging case, usually requiring UN38.3 transport documentation
Microphones — for calls, voice assistants, and ENC noise reduction
PCB (printed circuit board) — typically FR4 glass-reinforced epoxy laminate
Plastic housing materials — usually ABS or PC resin
Charging case internals — battery, charging chip, LED indicator, contacts
Codec support (SBC, AAC, aptX, LDAC, or LC3 for LE Audio) is largely determined by the chipset choice made at this stage, so it’s worth asking your factory which platform they’re building on before you lock in feature claims for your listing.
Step 3: Driver and Acoustic Engineering — How the Sound Actually Gets Made
This is the part most articles skip, and it’s the part that actually determines how the earbuds sound.
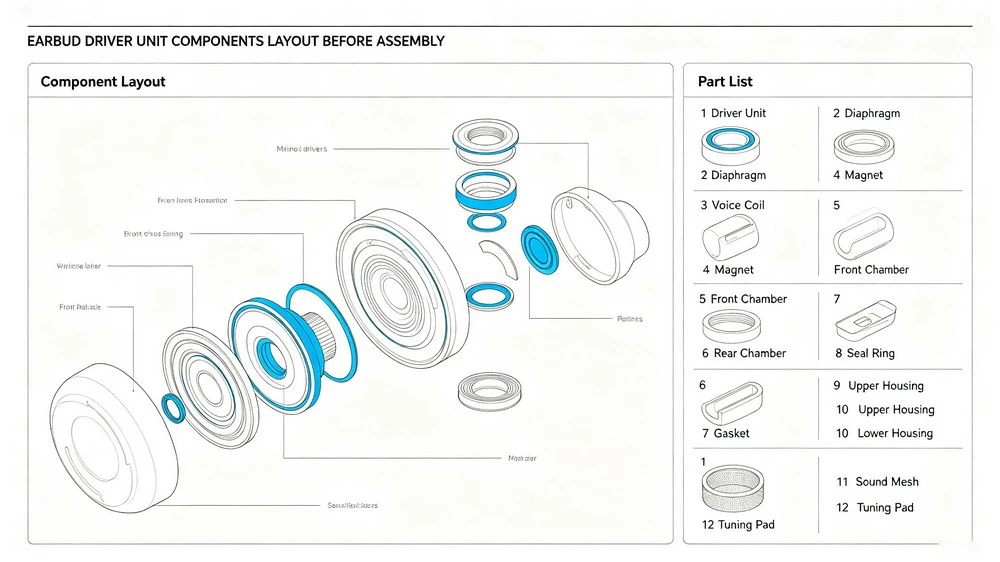
Every dynamic driver works on the same basic principle as a full-size speaker, just shrunk down. A thin diaphragm — usually mylar, polyimide, or a composite film — is stretched and shaped to a precise tension. Around it, a voice coil made of fine copper or aluminum wire is wound with automated winding equipment, since even minor inconsistencies in coil winding show up as audible distortion. A permanent magnet, almost always neodymium for its strength-to-size ratio, is positioned to create a magnetic field around the coil.
When an electrical audio signal runs through the coil, the interaction between the coil’s magnetic field and the driver’s magnet forces the diaphragm to vibrate. Those vibrations push air, and that’s the sound wave that reaches your ear. Higher-end designs sometimes use dual drivers per earbud — one tuned for bass, one for treble — or a balanced armature setup for more controlled frequency response.
Once assembled, drivers go through frequency response and distortion testing before they’re approved for installation into the shell. A driver that measures well in isolation but gets installed into a poorly sealed acoustic chamber will still sound thin — which is why Step 6 matters as much as this one.
Step 4: Injection Molding — Making the Shells
The outer shell of the earbud and its charging case is produced through injection molding. Plastic pellets, usually ABS or PC resin depending on the durability and finish requirements, are melted and injected under pressure into a precision steel mold.
The mold itself is the single biggest tooling investment in a custom project — it determines the exact shape, wall thickness, and surface finish of the final product, and it’s expensive to modify once cut. After the plastic cools and solidifies, shells are ejected and visually inspected for flash, sink marks, or short shots. Higher-volume factories use robotic arms at this stage to keep cycle times and consistency stable across a production run, since human handling introduces more part-to-part variation.
If you’re evaluating an ODM platform versus a full custom mold build, this is the stage where the cost and lead-time tradeoff shows up most clearly: an existing mold means samples in days, a new mold means weeks of tooling time before you see a single physical unit.
Step 5: PCB Assembly (SMT)
The PCB is effectively the earbud’s brain — it manages Bluetooth connectivity, audio processing, power distribution, and touch or button inputs. It’s built using Surface Mount Technology (SMT):
Solder paste is printed onto the bare PCB
High-speed pick-and-place machines position each tiny component — resistors, capacitors, the Bluetooth chipset — onto the board
The populated board passes through a reflow oven, which melts the solder paste and permanently bonds each component in place
After reflow, boards go through automated optical inspection and functional testing before they’re cleared to move into acoustic assembly. A defect at this stage — a cold solder joint, a misplaced component — is far cheaper to catch here than after the earbud is fully sealed.
Step 6: Acoustic Assembly and Sealing
This is one of the most quality-sensitive steps in the entire process, and it’s also one of the easiest to rush. Technicians install the tested driver into the shell, seal the acoustic chamber, and position the microphone precisely enough for clean voice pickup and effective noise cancellation.
Sealing matters more than it sounds like it should. A slightly imperfect seal changes the internal air pressure of the acoustic chamber, which changes bass response — this is a common reason two units from the same production batch can sound noticeably different. Factories with real acoustic testing equipment sample-test units coming off this line specifically to catch that kind of variation before it reaches final QC.
Step 7: Final Assembly
Final assembly brings every subsystem together into one working unit:
Installing the completed PCB into the earbud shell
Connecting the battery and driver leads
Sealing the housing, typically via ultrasonic welding or precision adhesive bonding
Assembling the charging case, including the charging contacts and indicator LED
Most factories run this on semi-automated lines, with skilled workers handling the delicate manual steps — battery connection and housing alignment — that machines still can’t do as reliably as a trained technician.
Step 8: Firmware Programming and Pairing
Hardware assembly doesn’t make a working product on its own. Each unit gets flashed with firmware that handles Bluetooth pairing behavior, touch control mapping, ANC/ENC tuning parameters, and battery management calibration. Earbuds are then paired to their specific charging case so the pairing and charging-status handoff works correctly out of the box.
This is also where a lot of the “customization” an OEM client asks for actually happens — touch control sensitivity, ANC intensity presets, or voice prompt language are firmware-level changes, not hardware changes, which is part of why they’re relatively fast and inexpensive to adjust compared to a mold change.
Step 9: Quality Control and Testing
No unit should reach packaging without clearing multiple QC checkpoints. On our own line, that looks like: incoming material inspection before parts ever reach the assembly floor, PCB and acoustic testing after SMT, in-process assembly inspection, 100% charging and battery aging testing on every unit (not a sample), and a final function and appearance check before anything is boxed.
Beyond that, factories typically run:
Bluetooth range and connection stability testing
Battery charge cycle and lifespan testing
Drop and durability testing
IPX water and sweat resistance testing, where applicable
The difference between a factory that treats QC as a checkpoint versus a formality shows up almost entirely in your return rate six months after launch — not in the sample you get approved.
Step 10: Certification, Branding, and Packaging
For products headed to the US, EU, or Middle East, certification isn’t optional paperwork — it’s what gets your shipment through customs and keeps your Amazon listing compliant. Depending on the destination market, factories prepare documentation for FCC, CE, RoHS, BQB (Bluetooth SIG qualification), UKCA, and UN38.3 for battery transport.
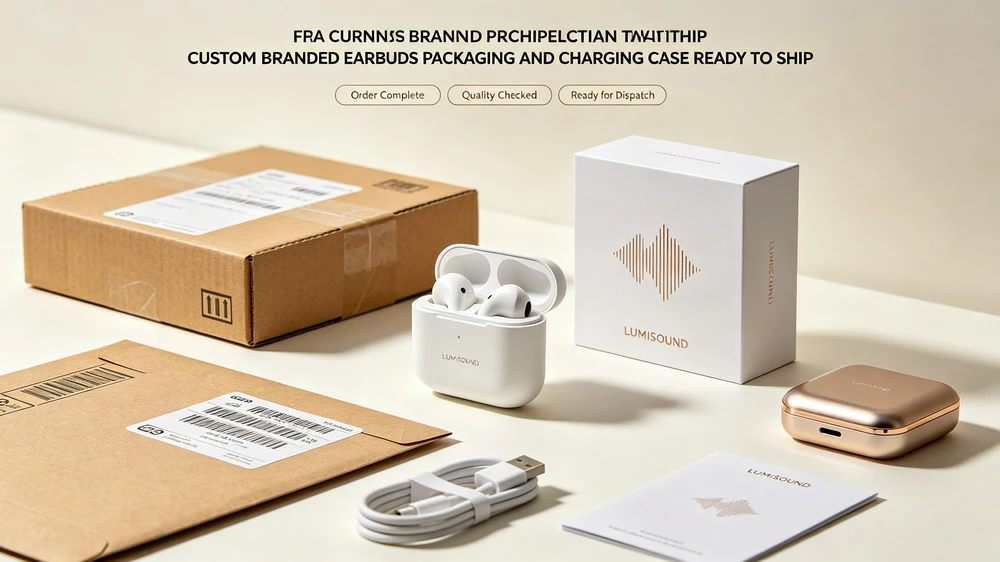
For OEM and private label clients, this stage is also where branding gets applied: logo printing or laser engraving on the earbuds and case, custom color-box packaging, printed manuals, and any bundled accessories like extra ear tips or a charging cable. Packaging isn’t just protective at this point — for an Amazon listing, unboxing experience directly affects conversion and review sentiment, so it’s worth treating as a real design step rather than an afterthought.
Step 11: Warehousing and Shipping
Finished, QC-passed units move into warehousing ahead of shipment. Factories manage inventory control, export packaging, and logistics coordination across air, sea, or courier shipping, along with preparing the certification documentation buyers need for customs clearance.
For reference, a typical OEM production timeline on an established platform runs something like this: sample preparation takes 5–10 days, packaging and branding confirmation another 5–7 days, and mass production 25–35 days once samples are approved. A full custom build with new tooling takes meaningfully longer, mostly due to mold fabrication time.
What Are Earbuds Made Of?
Pulling the material list together from the steps above: the shell is ABS or PC plastic, the diaphragm is mylar, polyimide, or a composite film, the voice coil is copper or aluminum wire, the magnet is neodymium, the PCB substrate is FR4 epoxy laminate, ear tips are silicone or memory foam, and internal wiring or acoustic filters often use fine mesh fabric to protect the driver from moisture and debris. None of this is exotic — the complexity is in the tolerances, not the materials themselves.
Wired vs. Wireless Earbuds: Does the Process Differ?
The core driver and acoustic engineering — Steps 3 and 6 — is essentially the same for wired and wireless earbuds, since both rely on the same diaphragm-coil-magnet mechanism to produce sound. What changes is everything wireless earbuds need on top of that: a Bluetooth chipset, a battery in each earbud, charging contacts, a charging case with its own battery and circuitry, and firmware to manage all of it.
That’s why true wireless (TWS) earbuds involve more component sourcing, more PCB complexity, and more QC checkpoints than a wired pair — there’s simply more that can go wrong, and more that needs testing.
OEM vs. ODM: Where You Enter This Process as a Buyer
Most buyers don’t walk in at Step 1. They enter at a specific point in this process, and which point depends on the sourcing model:
| Sourcing Model | You Enter Around | What’s Already Fixed | Speed & Risk |
|---|---|---|---|
| ODM (existing platform) | Step 8–10 (firmware, branding, packaging) | Mold and chipset combination, pre-validated | Fastest, lowest risk, lowest capital |
| OEM (semi-custom) | Step 4–8 | Base platform, with color/housing/firmware tweaks | Moderate speed, moderate control |
| Full custom development | Step 1 | Nothing — new mold, possibly new acoustic chamber | Slowest, highest cost, full control |
For most Amazon sellers testing a new SKU, an ODM platform gets you to market faster and with less capital at risk than a full custom build — the manufacturing fundamentals are already proven, and your differentiation comes from branding, firmware tuning, and packaging rather than hardware you’d need to validate from scratch.
Choosing a Manufacturing Partner
Once you understand the process, evaluating a factory gets a lot more concrete. Ask specifically which chipset platform they build on, what their QC checkpoints look like at each stage (not just “we test everything”), whether 100% of units go through battery aging testing or just a sample, and what certifications they routinely prepare for your target market.
At Tashells Audio, this is the process we run on our own TWS and ANC earbuds lines in Dongguan — injection molding and PCB assembly in-house, acoustic testing at multiple checkpoints, and 100% charging and battery aging testing before anything reaches packaging. If you’re evaluating an OEM or private label project, it’s worth walking your factory through this same sequence and seeing where their answers get vague.
FAQ
What are earbuds made of? Earbuds combine plastic housings (ABS or PC resin), a driver assembly with a mylar or polyimide diaphragm, a copper voice coil, and a neodymium magnet, an FR4 PCB, a lithium battery, and silicone or foam ear tips. Wireless models add a Bluetooth chipset and charging case electronics.
How long does it take to manufacture earbuds? On an established OEM platform, expect roughly 5–10 days for sample preparation, 5–7 days for packaging and branding confirmation, and 25–35 days for mass production once samples are approved. A full custom design with new tooling adds several additional weeks for mold fabrication.
How is sound produced inside an earbud? An electrical audio signal passes through a voice coil positioned inside a magnetic field created by a permanent magnet. The interaction between the two forces makes the coil — and the diaphragm attached to it — vibrate, which pushes air and produces the sound wave you hear.
What’s the difference between OEM and ODM earbuds manufacturing? ODM means you’re building on an existing, pre-validated mold and chipset platform with customization limited mostly to branding and firmware. OEM/custom development means new tooling and a design process that starts much earlier, with more control but a longer timeline and higher upfront cost.
Why do some earbuds cost more than others? Cost differences usually trace back to chipset platform (Qualcomm generally costs more than Jieli or BES), driver quality and configuration (dual drivers or balanced armatures cost more than a single dynamic driver), certification scope, QC rigor (100% testing versus sampling), and tooling amortization if a custom mold is involved.
Are wired and wireless earbuds manufactured differently? The core acoustic components — diaphragm, coil, magnet — are essentially the same. Wireless earbuds add a Bluetooth chipset, per-earbud batteries, a charging case, and firmware, which means more components to source, more assembly steps, and more QC checkpoints than a wired pair.
Final Thoughts
Manufacturing earbuds is a sequence of small, testable decisions — chipset platform, driver configuration, mold tolerance, QC checkpoints — each of which shows up later as either a product your customers trust or a spike in returns you didn’t see coming. Knowing the process doesn’t just satisfy curiosity; it gives you the right questions to ask before you commit to a factory.
If you’re sourcing your next earbuds SKU and want to see this process applied to your own project, get in touch with our team for a quote or sample request.